introduction
For years I’ve tried to learn Morse Code, and like any language, if you don’t practice you are going to struggle to be fluent with it.
You can learn morse just by listening and copying, but IMHO that’s harder and less fun. I think it’s better to learn it by hearing and sending it at the same time, the same with a spoken language.
There are several excellent practice sites on the internet to help with learning morse, here are a few:
- ham radio solutions a good way to practice with others
- lcwo lots of good exercises, but better for improving your copy speed
- morsecode.me another online morse site to send code with real people
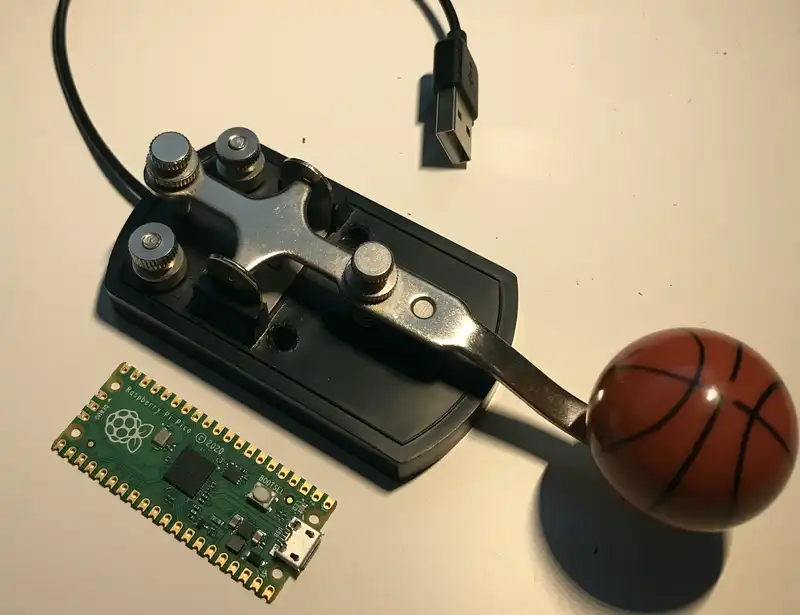
You can send code just using your mouse or keyboard, but I wanted to have something that behaved physically closer to a “real” morse key.
I did have a cheap morse key rattling around. I’d bought it years ago and never really did much with it. I wanted to somehow connect it to my computer so I could use it on the test sites listed above. Looking for what others have done, tearing apart an old mouse and wiring the morse key as a ‘left click’ seemed to be a popular and cheap solution.
However, I also had a couple of new Raspberry Pi Pico boards laying around looking for use…
A project was born.
Testing the Pico
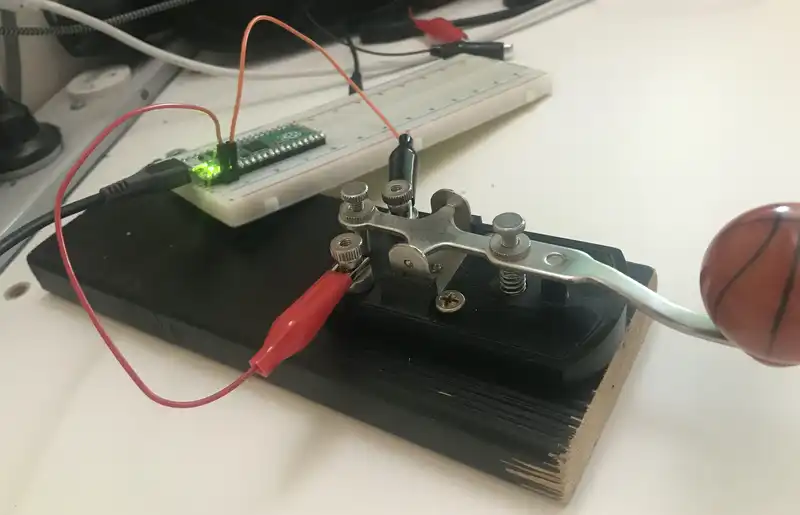
After physically mounting the Pico to a breadboard, connecting it to the morse key using jumper wires, and connecting it to my computer via USB, the next step was get the code working.
If you’re completely new, I wont go into the basics of how to start coding with the Pico. The Raspberry Pis Getting Started with MicroPython free digital book is a good place to start.
Ham radio solutions (my preference) uses either [ or ] key in straight key mode, so I wanted to make the Pico to send that key.
To get the Pico to act as a keyboard HID (Human Interface Device) I tried several methods using generic Python and C, but playing with code ended up being too distracting from the main goal. I found it was much quicker and easier to use CircuitPython. It’s bread and butter to act as a HID for it and made it super easy.
A small gripe it that it will constantly show up as a drive, but that’s not a huge deal. Were here to learn morse code, not write (too much) computer code, so lets get on with it.
An easy way to load code onto the Pico is to use an IDE called Thonny. You’ll also need to install CircuitPython. I can’t remember how to do it as it was a while ago, just follow the instructions and you’ll be okay.
After many many iterations, this is the code I was happy with. A lot of this is copied from the Adafruit examples with tweaks around the edges. There’s heaps of stuff they’ve published under the Adafruit Learning System Guides, go check it out.
To run this code, you’ll need to install the adafruit_debouncer library. See Adafruit Debouncer Library.
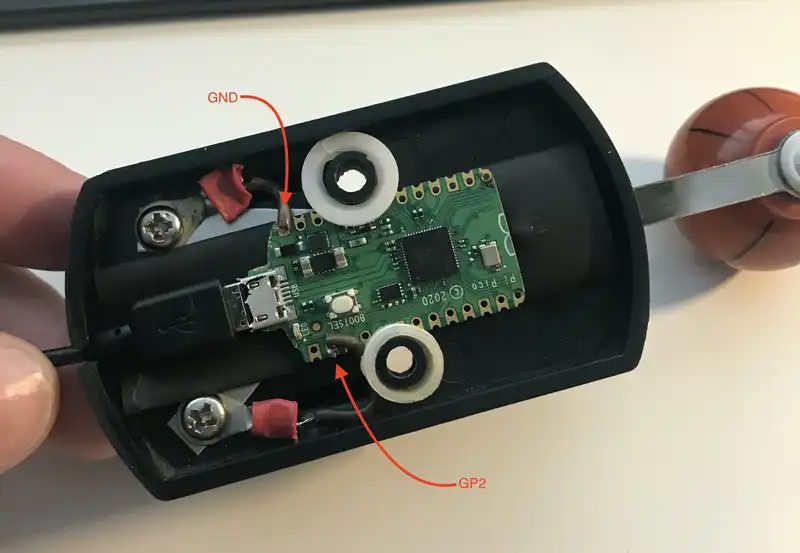
Change board.GP2 to whatever pin you use. You’ll see in the pictures that I picked GP2 as it was close to the same end of the board as the USB connector and on the other side to the ground pin.
There’s probably a better way to do this; would love to hear improvements.
The Code
import usb_hid
import board
import digitalio
from adafruit_hid.keyboard import Keyboard
from adafruit_hid.keycode import Keycode
from adafruit_debouncer import Debouncer

kbd = Keyboard(usb_hid.devices)
key = Keycode.LEFT_BRACKET #https://hamradio.solutions/vband/
#key = Keycode.SPACEBAR    #http://morsecode.me/

pin = digitalio.DigitalInOut(board.GP2) #change to your pin
pin.direction = digitalio.Direction.INPUT
pin.pull = digitalio.Pull.UP
switch = Debouncer(pin)

while True:
    switch.update()
    if switch.fell:
        kbd.press(key)
    if switch.rose:
        kbd.release(key)
Fit the Pico
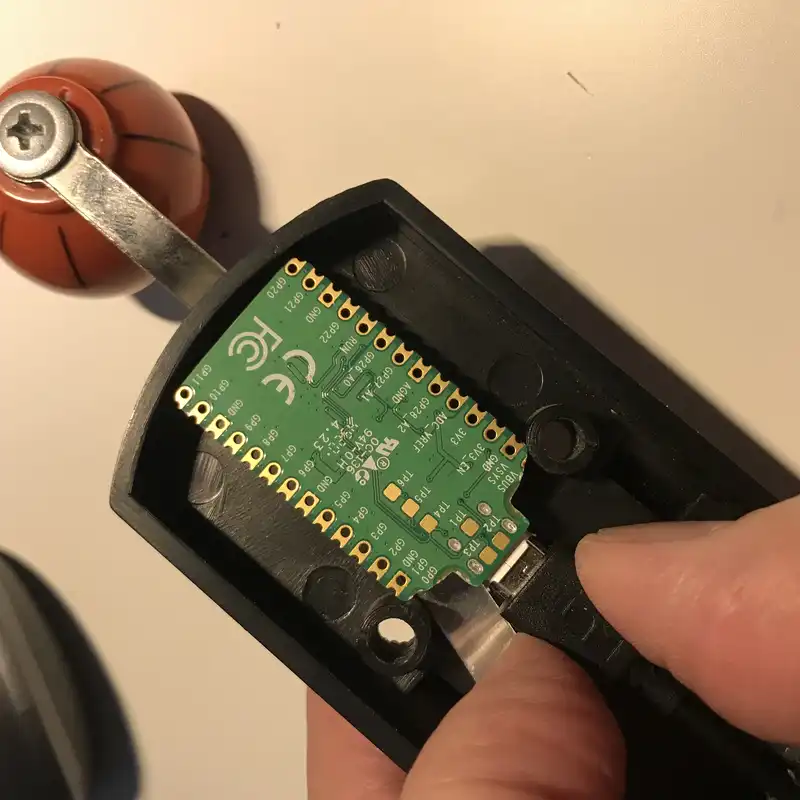
Next step after making sure the code ran enough, it was time to fit the Pico into the base of the morse key.
The Pico is small, but just not quite small enough.
Time to bust out the sharp tools and get mum on speed-dial…
The Pico is designed in such a way that everything on the far end of the board is just traces. I’d read that others had cut these with success, and as they’re only a $4 part no great loss if it goes wrong.
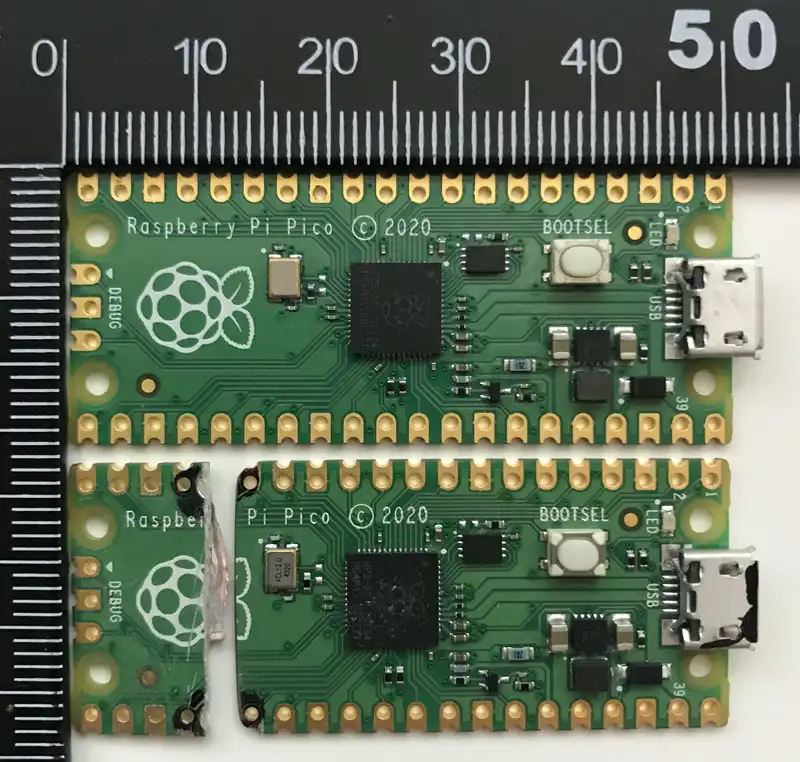
Testing proved it was still good and everything was working fine after chopping almost a third off the end.
After the first cut, I rounded off the corners and removed even more material to try and make it fit better. A quick inspection shows the corners near the USB socket don’t have components, so more cutting and careful filing and I’ve removed as much material as I’m comfortable with (for now).
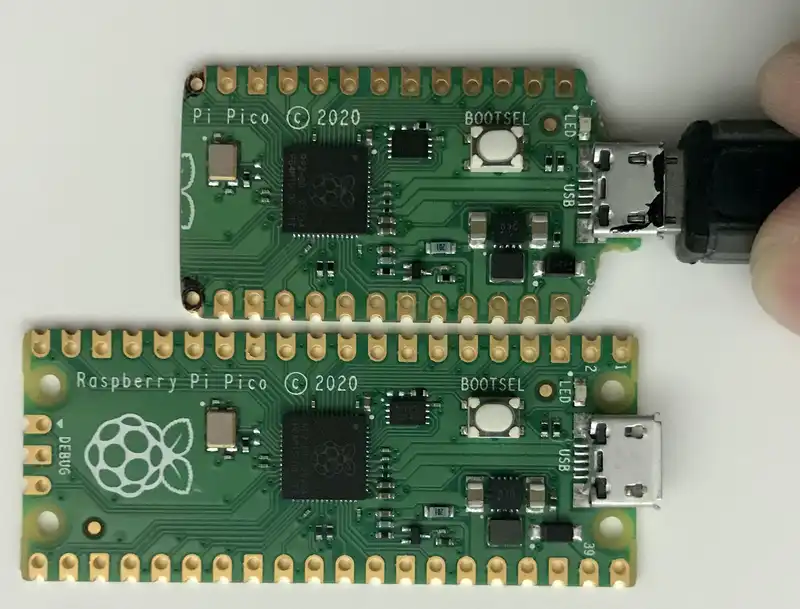
Testing the board along the way proved that it was still working fine.
Fitting it into the base of the morse key shows why I was removing the front two corners. I planned to keep the two plastic posts intact for later mounting onto a board. Without doing this the key is far too light and difficult to use.
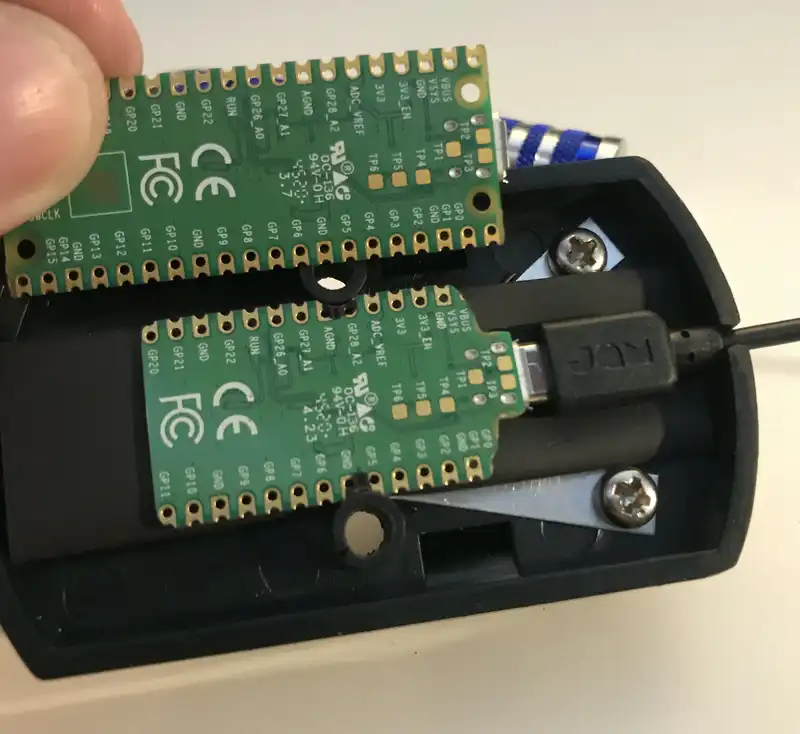
Then I changed my my mind, and worked out I could use the Pico to hold the USB cable in place against the base of the morse key.
As using the key means a lot of physical movement, I was super paranoid it would come loose as I used it, and I’d have to unscrew it from the wooden base to reattach the cable.
In the pic, you can see how the Pico would have physically fit inside the base of the key without cutting it in thirds. Oh well, it’s still an interesting thing to try.
Nice and snug, that cable wont go anywhere
I did have to cut small notches where the plastic mounting posts are on the morse key. You can see the marks I’d made on the Pico with a pen to help me find where to cut. I didn’t mind this as it would ensure it is securely held in place and wont move or rattle while it’s used.
I measured it very carefully to make sure the USB cable would be held in place once the Pico was put into the base.
I also inserted some rubber shrink tubing to electronically isolate the components from the metal connections in the base of the morse key.
The Morse Key
After much thinking, I decide to flip the Pico over inside the base. I wanted to leave the BOOTSEL button exposed so that if I had to I could still take it partly apart to press it. So far, this hasn’t been necessary at all. Occasionally it’s needed a unplug/re-plug to get it going, but other than that it’s been rock solid.
This last shot shows plastic washers added to the plastic mounting poles to keep the Pico and it’s BOOTSEL button clear of the mounting wood.
You can also see the wires soldered to the Pico are attached to the underside of the poles for connecting the wires. I could still use this as a “normal” morse key as it’s all electrically the same as before.
Not too bad, nice fit and quite compact. Yes, the crimp job is shocking on those lugs.
This is now ready to screw down to a piece of wood.
Job Done
Somewhere along the way I’d had this nice bit of wood that I’d been keeping for a random project. It looked great for the morse key and lifted it off the desk making it a comfortable height.
Measuring carefully again, I added recessed bolts from the underside. These come through and I used little nuts on top to hold it together. I also added some small rubber feet to stop it wandering around on the desk as I used it.
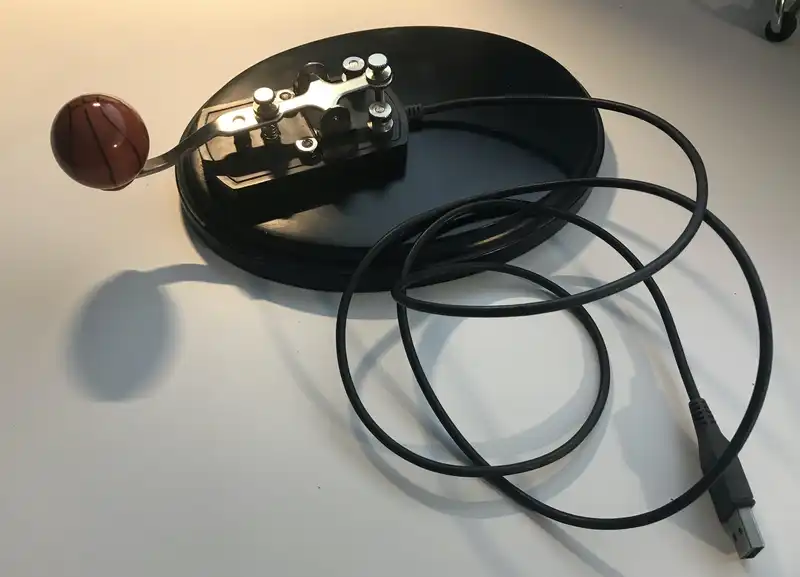
Using the key works wonderfully and exactly what I’d hoped.
Now to do something about that plastic door knob. It was from an old kids cupboard and I’m sure I could find something nicer.
Oh, and actually start practising…
things to try
- Add weight to the opposite side to stop they key tilting forward
- Perhaps add a LED that shows power and send status